Winnie the Pooh is a classic theme for a baby shower. This theme can be used with different color schemes or any gender, including gender neutral.
The mom-to-be didn’t want a lot of pink, so I chose to go with a balance of green, gold/yellow and pink instead.
All about the details:
The very first thing I picked out where these tablecloths. This was a good starting point to base the rest of the decorations and colors around.

Next, I found a matching set of food plates, cake plates, napkins AND pink forks. The pink forks were a bonus since I planned on purchasing pink forks to go with another project I had planned (more on this later). Also, I found matching party favor bags that I filled with the following:
- Glass jars that came with: wooden honeycomb dippers, burlap strings, bee charms and stickers for the jar – I filled these jars with store bought honey
- “Sweet as can Bee” Chapstick
- Peach Honey Tea Bags
- Honey Sticks
Centerpieces – now that I have the base colors I wanted to dull down the ‘pink’ – the majority of the tablecloth (on top). To do this, I found green place mats that went nicely under my “honey pots” I made.
Making Honey Pots –
Step 1: find basic flower pots and pick a size that best fits what you would like to put in them. For centerpieces, I did baby’s breath and character cut-outs so I wanted a bigger flower pot for those. I also wanted one to hold the forks and got a smaller flower pot.
Step 2: find a paint color to be “honey.” I went with basic ‘yellow’ in the ‘Craft Smart’ brand of paint.
Step 3: paint the “honey.” This was tricky. I am not someone who can draw – which I started off trying to draw the “drippings of honey.” Let me tell you, that didn’t work for me. Instead, I painted the lip of the flower pot, all the way around. Next, I loaded my paintbrush with the paint and pressed it along the bottom of the lip of the flower pot. This allowed the paint to drip naturally down the flower pot. You may have to do some touch-ups to the lip of the flower pot where you pressed your paintbrush.

Step 4: I recommend waiting for the paint to dry before writing “hunny” in case of any excess paint dripping. Before writing, I pulled up a picture of Pooh’s “hunny” pots to try to mimic the handwriting.
Step 5: fill with flowers, baby’s breath, character pictures, food utensils, photo booth props and more
Step 6: on the day of – I spread these all throughout the party. I used them on the gift table, guest book table and an extra table that was out. When the party was over the mom-to-be took these home.

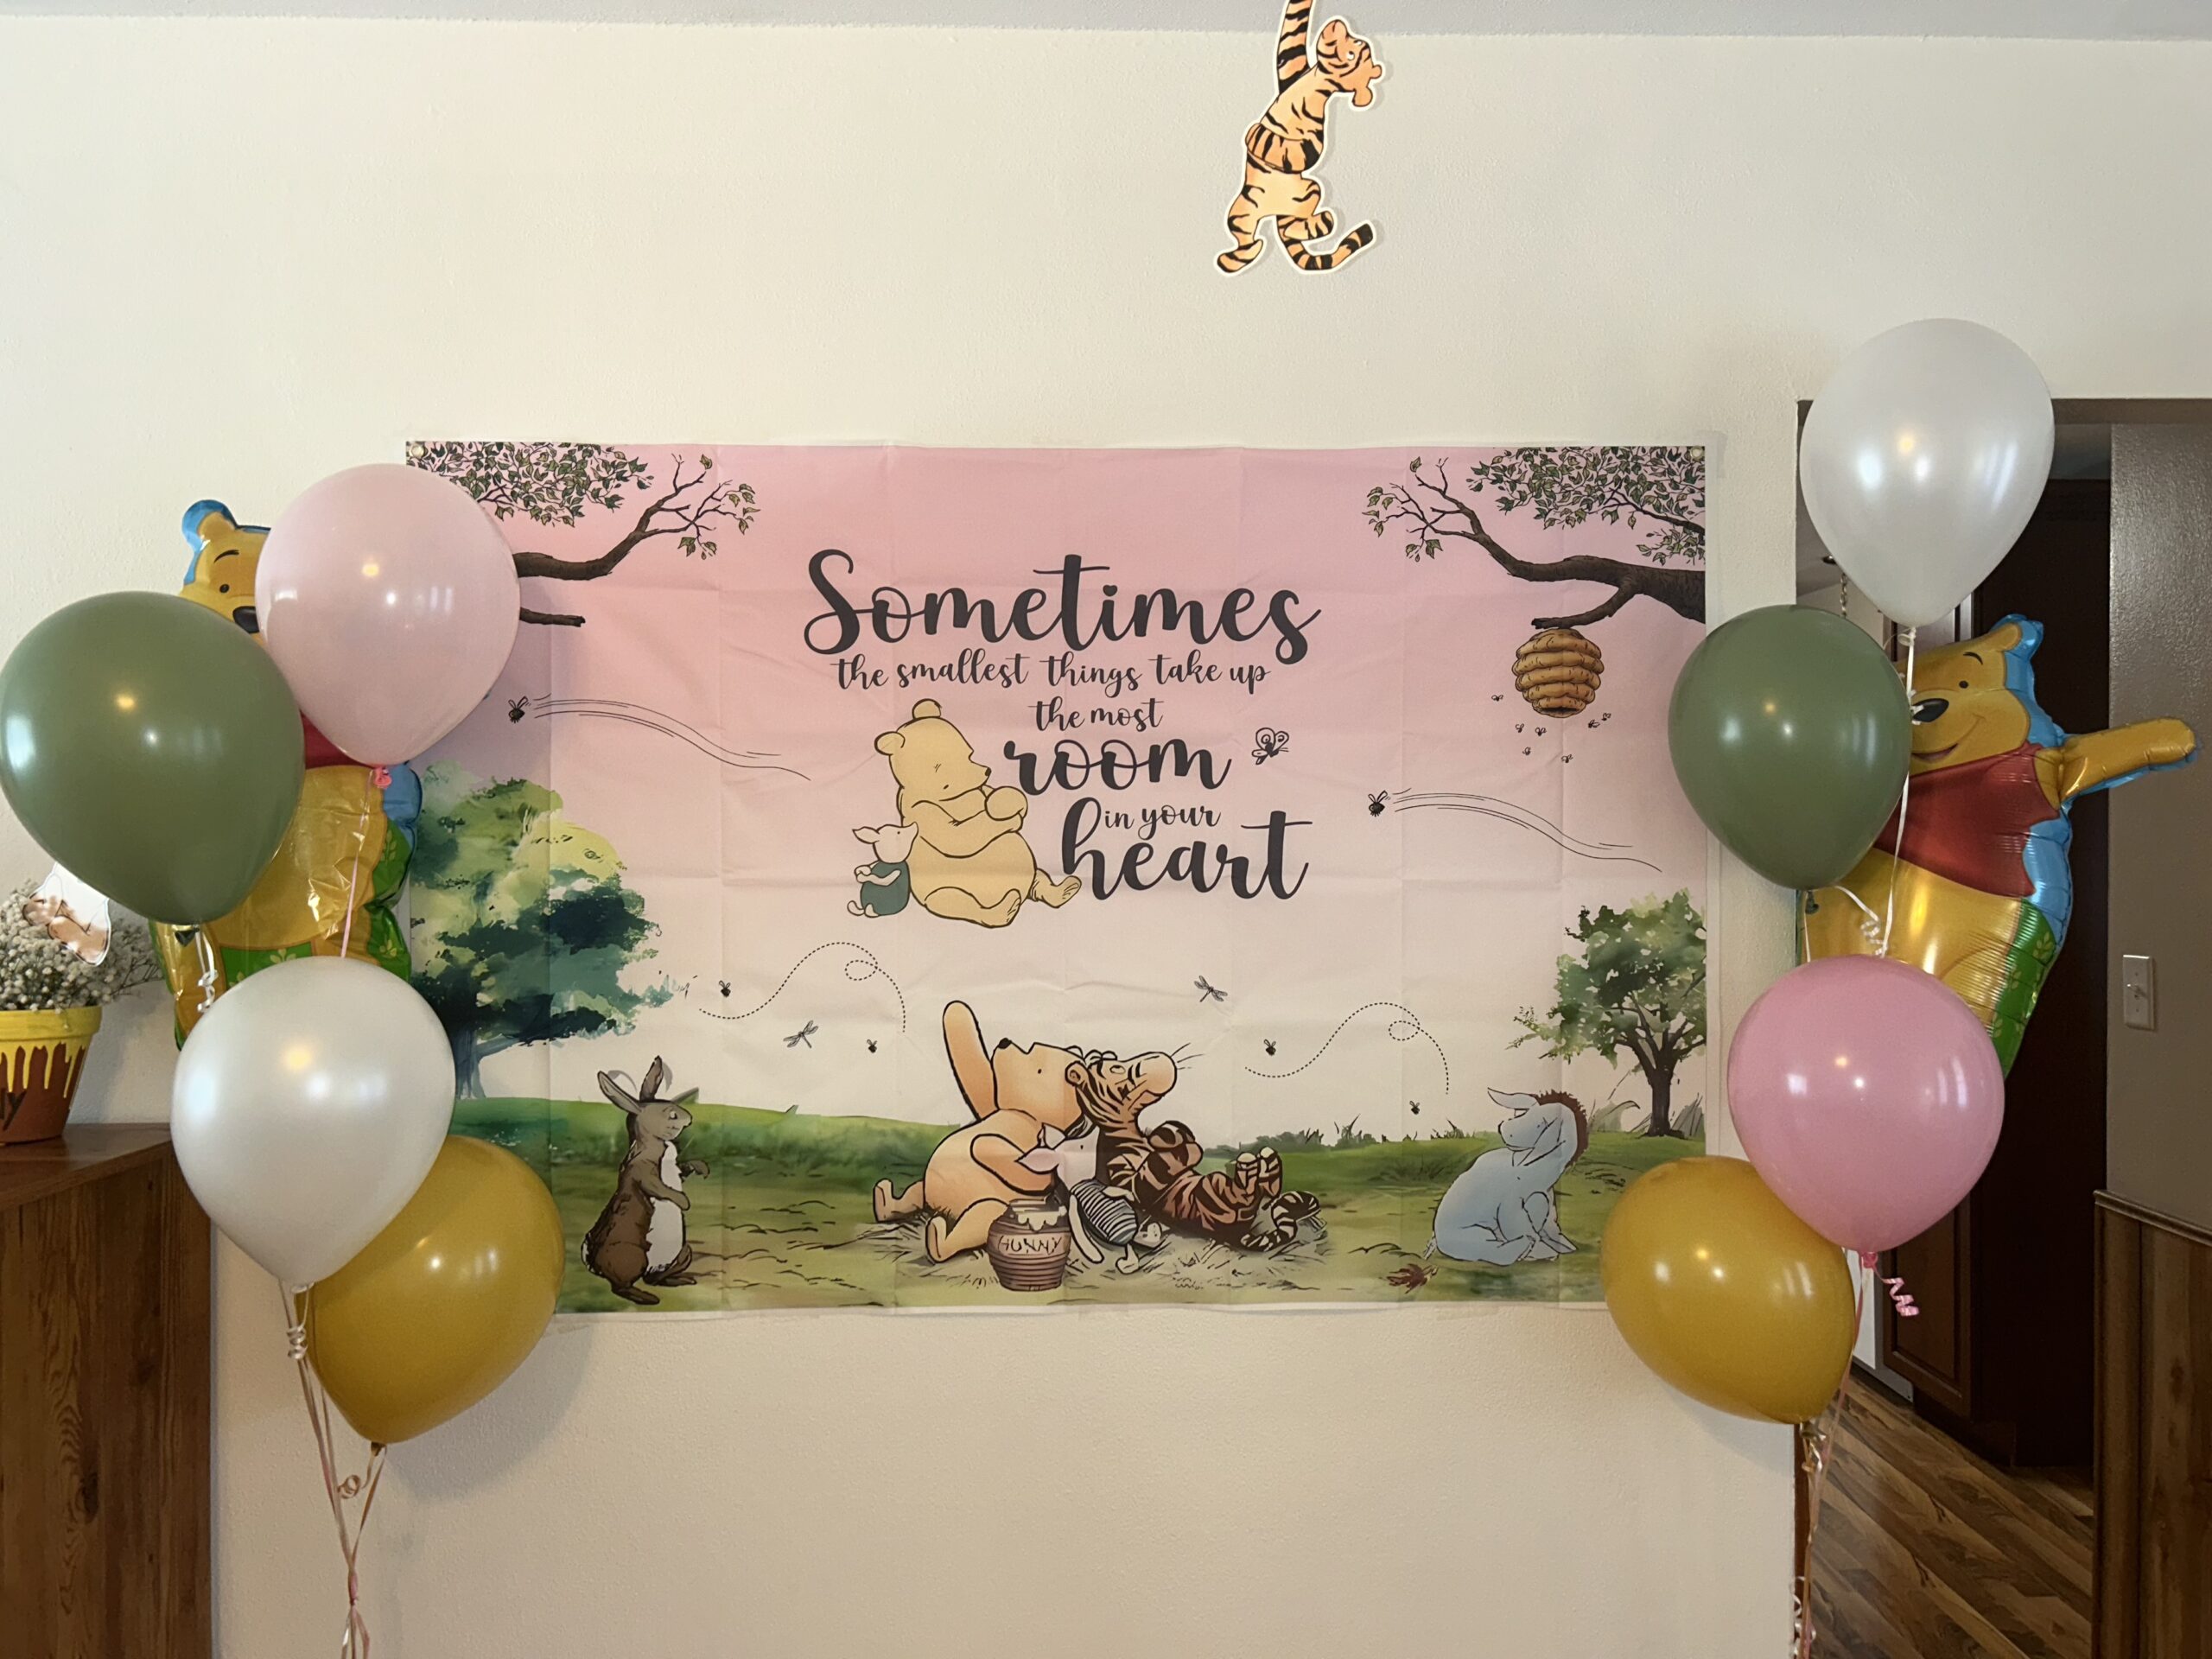
Backdrop – I love a good photo booth or backdrop for guests to take pictures in front of. I found this one that matched the tablecloths and came with a “welcome baby” sign I hung above the food table. Then, I picked out balloons that matched the color scheme best at my local grocery store.

Games –
I wanted to keep games for this shower simple. The mom-to-be wanted the shower to be co-ed which increased the number of guests.
Game #1: Diaper race. At other baby showers this game is played with 2 (or more) baby dolls and guests race to see who can change the baby doll’s diaper the quickest. To match my theme though, we did this with a stuffed Winnie the Pooh and Piglet. Doing this added a layer of difficulty, BUT made for a lot more laughs!
Game #2: Guessing jar. I filled a jar with Teddy Grahams to tie into the theme and invited guests to guess how many were inside. A small sign and guess cards were placed by the jar, and I set the game next to the guest book so everyone would see it. It was an easy activity guests could enjoy at their own pace.

Guest book – speaking of guest book. I wanted to go with something more unique. As I was looking around I found this wooden sign that had a picture frame stand to it. I found this to not only be unique, but tied to the theme, a keepsake and easy to store or put on display. I purchased Sharpie fine point markers to have guests sign with and made a sign to place next to it. I have included that for a free download below.

Food –
I’ve said this in a previous post and I’m going to say it again, I LOVE having themed food at my parties. For this baby shower, I did not want to serve a “meal” so I planned it for a time between lunch and dinner. Honestly, with the ones I chose, I could have pulled off serving a lunch.
I scrolled Pinterest for snacks & appetizers that fit with Winnie the Pooh. I made cute signs to go with each food item that you can download for free at the bottom of this post. I printed these on a light tan cardstock. Here are the foods I did:
Piglets in a blanket: basically, just pigs in a blanket, but changed the name. I purchased little weenies and crescent roll dough. I wrapped the little weenie up in the crescent roll dough and placed them in the oven according to the instructions on the crescent roll tube. I placed them on parchment paper to make taking them off the pan cleaner.

Pooh’s Smackerel of Honey: For this concept, I wanted to do “tea sandwiches” and incorporate honey somehow to fit the theme. I found a creamed cinnamon honey at a local apple orchard and paired it with apple butter. I found this cute stand to place the sandwiches on to really make the sandwiches like “tea sandwiches” while also using a cookie cutter to shape them.

Rabbit’s Garden: this was a simple fruit and veggie tray. I tried to pick three fruits and three veggies that I thought most people would eat while also picking items that would be found in Rabbit’s garden. I went with carrots, cucumbers and cauliflower for the veggies. For fruit, I went with strawberries, cantaloupe and honey dew.

Tigger’s Springs: I purchased store bought pasta salad that was made with the “Rotini” style noodles. This way it looked like “springs.”

Cake: I chose to do a cupcake cake from the bakery at our local grocery store. They had several Winnie the Pooh themed options to choose from to place on the cake. I liked the cupcake cake for convenience and less worry about trying to cut a cake. I was able to pick two different flavors of cupcakes. I went with: strawberry = pink for baby girl and yellow cake = gold-ish color for honey.


Below are the free download for the food labels.